Printing for staff

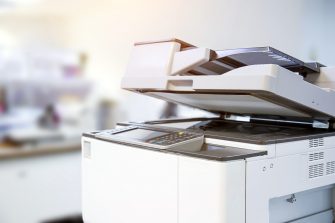
The Staff Managed Print Service (MPS) offers A3 and A4, black & white, and colour printing from any Mac or PC provided by UNSW to staff.
Adding a printer
Adding a printer is quick and easy. Follow our step-by-step guide to ensure a seamless setup and start printing from your devices in no time.
- Windows
- Mac
Adding a printer - Windows
- Open the Control Panel on your Windows computer.
- Navigate to View devices and printers under Hardware and Sound.
- At the top of the window, select Add a printer.
- In the Add a device window, click on The printer that I want isn’t listed.
- In the Add Printer window, select Select a shared printer by name.
- For a Lexmark printer, type: \\mpspwps200.ad.unsw.edu.au\print queue name
Example: \\mpspwps200.ad.unsw.edu.au\ITU-LC011 - For a Fuji Xerox printer, type: \\infpwps009.ad.unsw.edu.au\print queue name
- For a Lexmark printer, type: \\mpspwps200.ad.unsw.edu.au\print queue name
- Click Next. If prompted with, Do you want to allow this app to make changes to your device, select Yes. Follow the prompts to complete the installation.
Adding a printer – Mac
The following steps are for use on a UNSW-provided Mac. This process uses the UNSW Self Service App, which is installed on all UNSW Macs. If Self Service is not installed or you're unsure if your Mac was issued by UNSW, please contact the Service Desk for further assistance.
If you're using your own device, please continue to follow the self-serve instructions.
- Open the Self Service App from your Dock or the Applications folder.
- In the Self Service window, click on Printers under Bookmarks on the left side of the app.
- Click Install or Reinstall for the printer group that best matches your location or department.
- Note: You may see multiple printer groups depending on your role. Selecting several installations here won’t harm your system.
- Once installation shows "Done", go to System Preferences from the Apple logo in the top left corner of your screen.
- In System Preferences, select Printers.
- Check if your desired printer appears in the list of newly added printers.
- Note: If your printer isn't listed, return to step 3 and try installing another printer group. If no more groups are available, go to the 'Still Need Help?' section to log a ticket with the Service Desk for assistance.
- Note: If you're unsure of the printer’s name, refer to the “Finding A Printer's Name” section on this page.
- Right-click or secondary-click on your desired printer from the list. You can set the newly added printer as your default printer from the menu.

Staff MPS printer maintenance & general advice
- Power-saving functions: Staff printers have automatic power-saving functions. Turning off the power can disrupt proactive monitoring and automatic restocking of consumables.
- Reallocating printers: Contact the IT Service Centre if a printer needs to be reallocated. Reallocation changes the delivery details of consumables and location data must be updated to ensure uninterrupted resupply services.
- Toner usage: Use the delivered toner only on the designated printer to avoid affecting the low toner alert system.
We're here to help
We're here to help with all your tech needs, offering support and services to enhance your learning and work experience.

Sydney +61 2 9385 1333 (Mon-Fri 8am-8pm & Sat 11am-3pm) or Canberra +61 2 5114 5678 (Mon-Fri 8am-5pm)
IT walk-in service centres
- Upper Campus IT Hub - Room G06, D26 Biological Sciences Building (Next door to XS Cafe) (View on map, opens in a new window)
- Middle Campus IT Hub - G008, Ground Floor H13 Anita B Lawrence Centre (Formerly the Red Centre Building off University Mall) (View on map, opens in a new window)
- Paddington Campus IT Hub - Ground Floor, Block D, Paddington Campus (View on map, opens in a new window)
- UNSW Canberra ADFA Campus IT Hub - Ground Floor, Building 14, UNSW Canberra ADFA Campus (View on map, opens in a new window)


